Thingy:91 Test Application
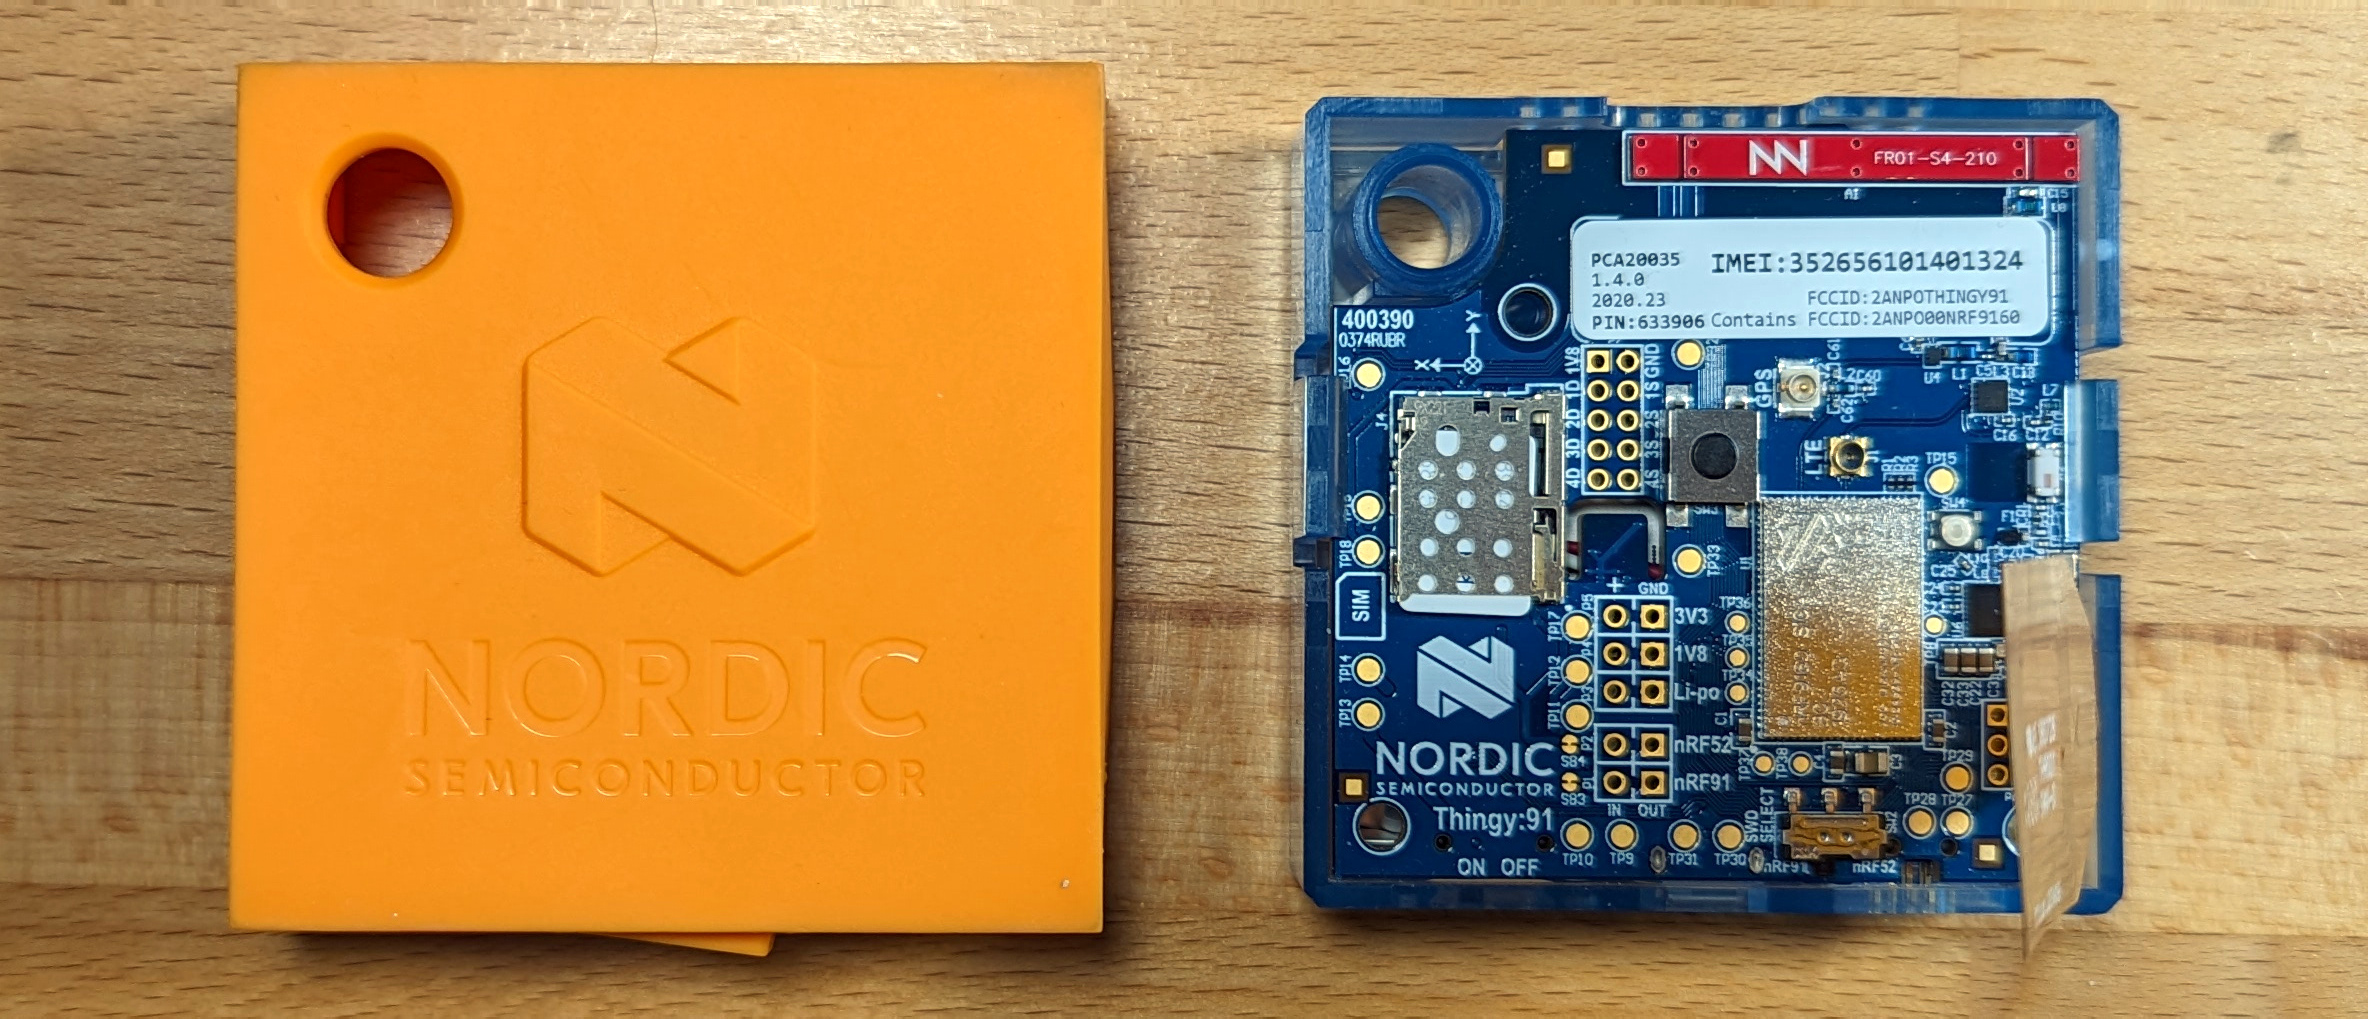
You can test out Golioth services using the Golioth Thingy91 Example Program for the Nordic Thingy:91. This nRF9160-based cellular device includes an accelerometer, light sensor, RGB LED, user button, a speaker—all of which are used in this demo.
The following Golioth Services are demonstrated by this application:
- Device Status
- OTA Firmware Update
- LightDB State (bi-directional data transfer)
- LightDB Stream (time-series device-to-cloud data transfer)
- Remote Logging
- Remote Procedure Call
Section Overview
Prerequisite: You must have an active SIM card installed in your Thingy91 to continue with this section.
- Install nRF Connect for Desktop to program the firmware to your Thingy91
- Download and program the precompiled firmware binary
- Add device credentials and connect to Golioth
- Test drive Golioth!
1. Install nRF Connect for Desktop
To program binaries to the Thingy91 we recommend starting with the Nordic nRF Connect for Desktop tools as they have great cross-platform support and work well.
Show me how to install nRF Connect for Desktop
-
Download Nordic's nRF Connect for Desktop software.
-
Mac and Linux Users: According to the Nordic install instructions you also need to install the SEGGER J-Link tools
-
Mac M1/M2 Users: Our testing found that you must use the
Universal Installerversion of the SEGGER tools
-
-
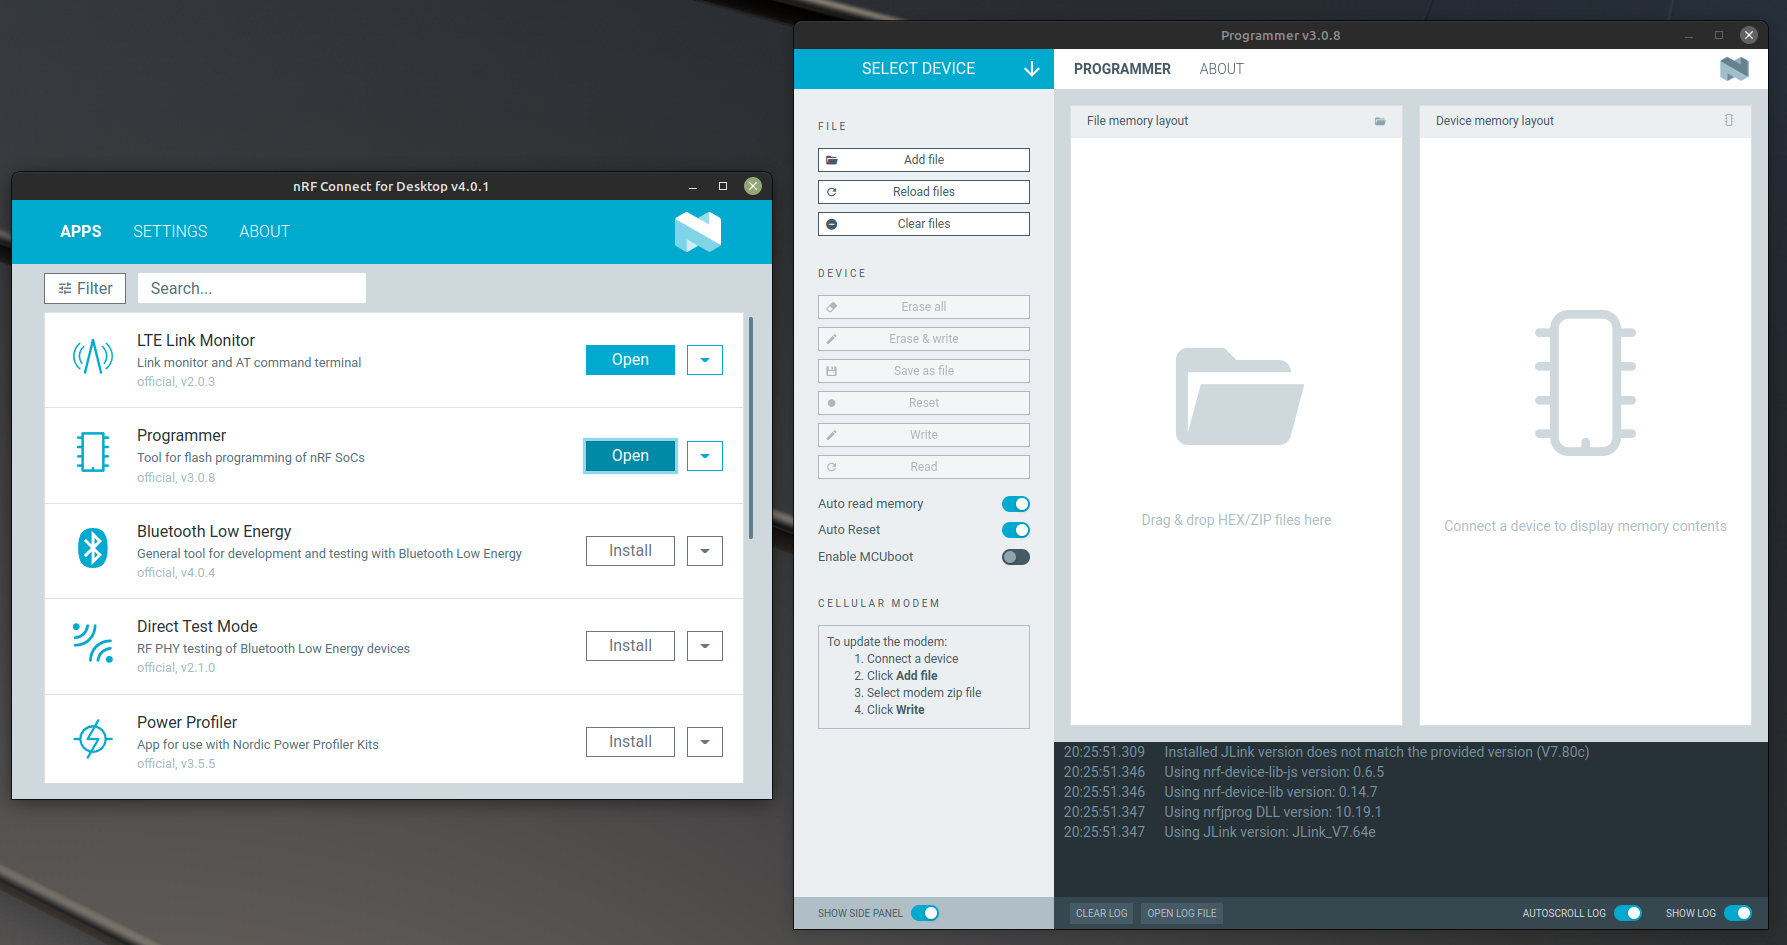
Launch nRF Connect for Desktop. From that application, install and open the Programmer.
2. Download and program the precompiled firmware binary
- Go to the latest
release and
download
thingy91-golioth_vX.X.X_thingy91_nrf9160_ns_mcuboot.hex - Flash the precompiled binary to the Thingy:91
- Remove the orange rubber case from your Thingy:91
- Plug a USB cable into your computer and into the Thingy:91
- Place the Thingy:91 in bootloader mode: With the Thingy:91 power switch in the off position, hold the black button in the middle of the board and turn the power switch on
- In the nRF Connect Desktop Programmer, choose
Nordic Thingy:91from the upper leftSELECT DEVICEdialog. - Click Add file and choose the
thingy91-golioth_vX.X.X_thingy91_nrf9160_ns_mcuboot.hexfile you previously downloaded - Click the
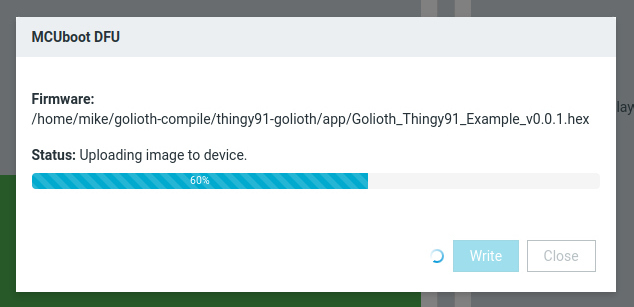
Writebutton
Show me screenshots of the programming process
Adding the firmware binary in nRF Connect for Desktop programming tool:
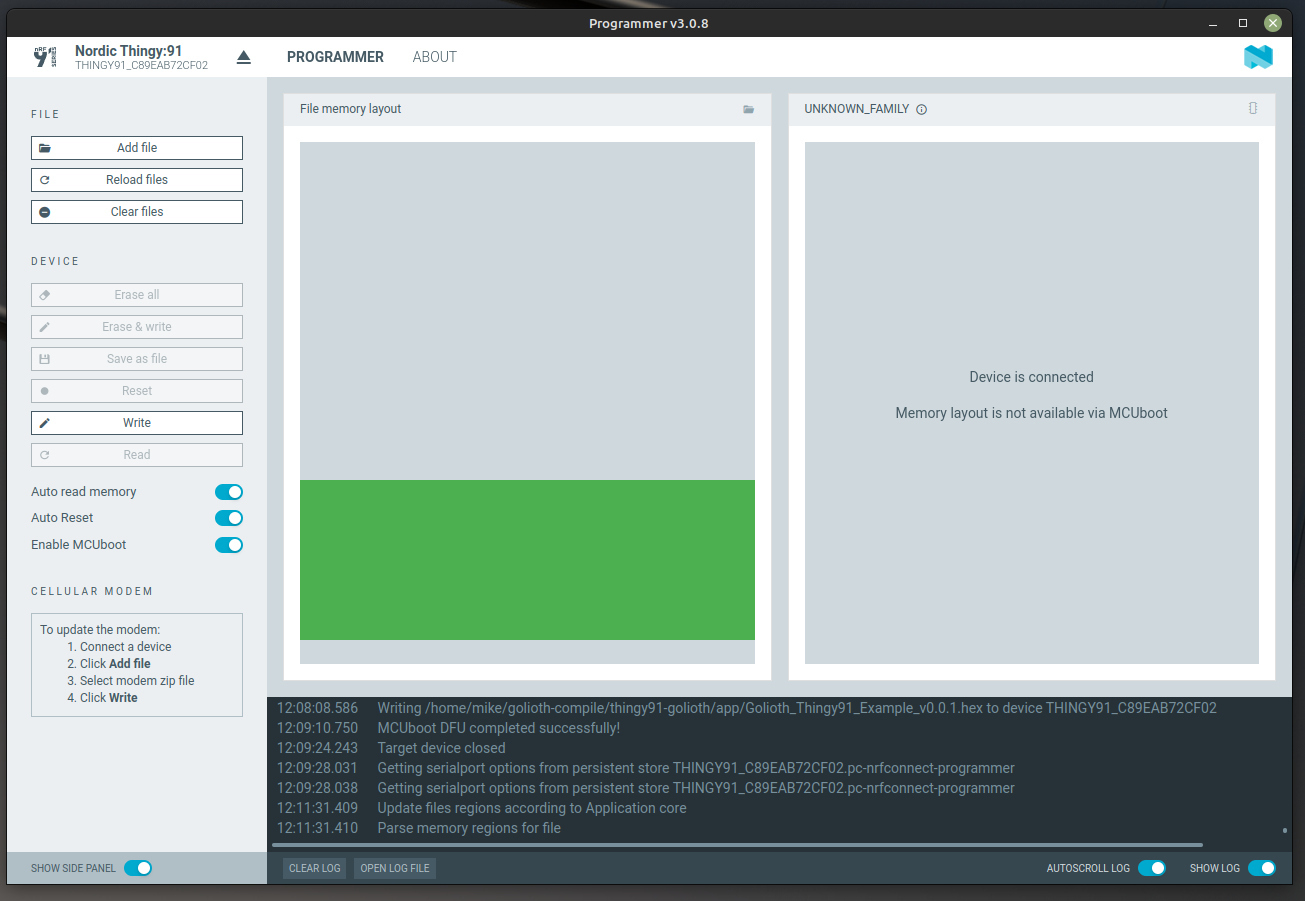
The MCUboot progress screen indicating a successful programming process:
3. Add device credentials and connect to Golioth
Golioth Device Credentials must be added to the device for it to connect properly. This is accomplished over USB using the Shell built into Zephyr.
-
Launch nRF Connect for Desktop. From that application, install and open the Serial Terminal.
-
Connect the Serial Terminal to your device
- Plug a USB cable into your computer and your Thingy:91
- Place the Thingy:91 power switch in the
Onposition - Choose
Nordic Thingy:91from the upper leftSELECT DEVICEdialog - Select the first of two available serial ports
- Click
Connect to Port
You can now turn the Thingy:91 power switch off and back on to see the serial output as it runs. We expect that the device will not be able to connect as it does not yet have credentials.
-
Use the serial connection to assign Golioth Device Credentials
Where do I find device credentials?Golioth Device Credentials were created during the Golioth Web Console Registration & Wizard step. You can return to the Golioth Console to retrieve the PSK-ID/PSK.
Use the following command syntax to assign your credentials. Type each line one at a time into the serial terminal, replacing the placeholder credentials with your own.
uart:~$ settings set golioth/psk-id "<my-psk-id@my-project>"uart:~$ settings set golioth/psk "<my-psk>"uart:~$ kernel reboot cold -
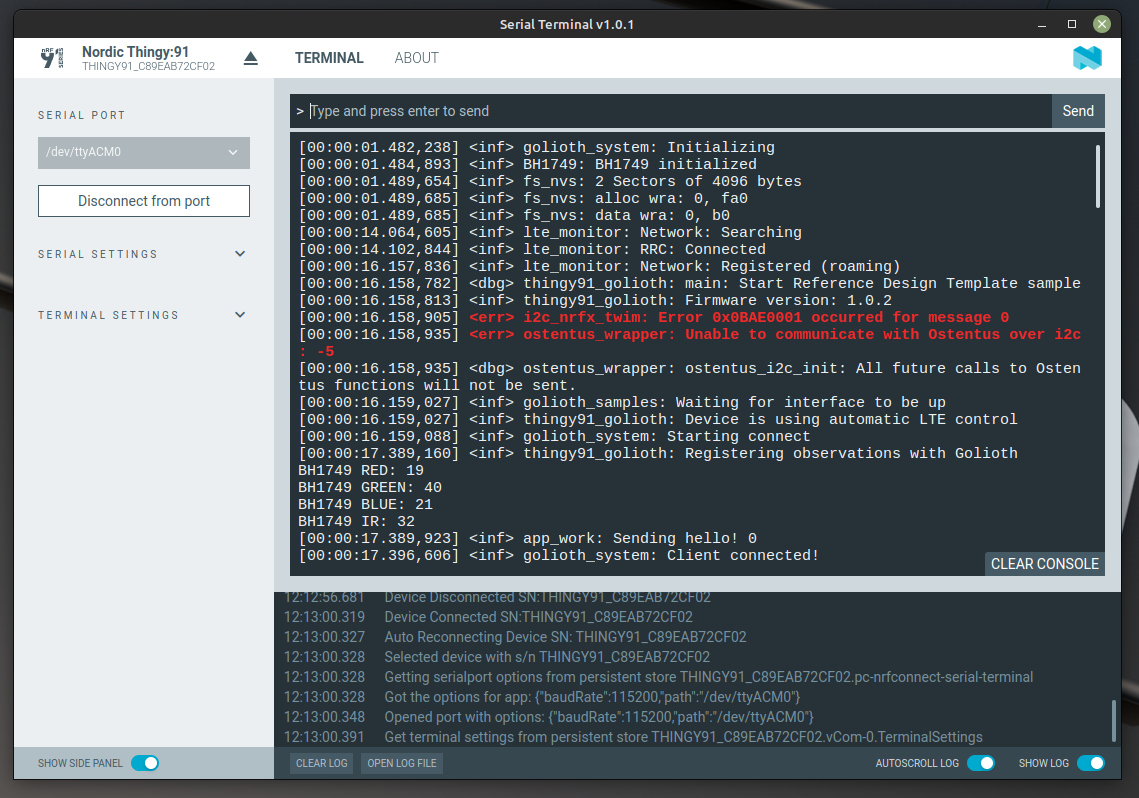
Observe the device connecting to Golioth
After the Thingy:91 reboots, the serial terminal will remain connected. You should see the device connect to LTE, then Golioth, and begin streaming data:
[00:00:01.483,825] <inf> golioth_system: Initializing[00:00:01.486,450] <inf> BH1749: BH1749 initialized[00:00:01.491,546] <inf> fs_nvs: 2 Sectors of 4096 bytes[00:00:01.491,546] <inf> fs_nvs: alloc wra: 0, fa0[00:00:01.491,577] <inf> fs_nvs: data wra: 0, b0[00:00:01.493,041] <dbg> thingy91_golioth: main: Start Reference Design Template sample[00:00:01.493,072] <inf> thingy91_golioth: Firmware version: 0.0.0+0[00:00:01.493,164] <err> i2c_nrfx_twim: Error 0x0BAE0001 occurred for message 0[00:00:01.493,255] <inf> golioth_samples: Waiting for interface to be up[00:00:01.493,286] <inf> thingy91_golioth: Connecting to LTE network. This may take a few minutes...[00:00:01.548,065] <dbg> app_work: buzzer_thread: golioth[00:00:01.548,126] <err> BH1749: No valid data to fetch.[00:00:01.548,126] <err> app_work: sensor_sample_fetch failed err -5[00:00:15.824,218] <inf> thingy91_golioth: Connected to LTE network[00:00:15.824,371] <inf> golioth_system: Starting connect[00:00:17.927,947] <inf> thingy91_golioth: Registering observations with Golioth[00:00:17.931,030] <dbg> app_settings: app_led_pwm_init: turning on pwm leds[00:00:17.931,060] <inf> golioth_system: Client connected!
Your Thingy:91 is a celluar device and must have an activated SIM card inserted in order to connect to the internet (and Golioth)
4. Test drive Golioth!
Video Walkthrough
The features of the Golioth Thingy91 Example Application are demonstrated in the following video.
Features and Services
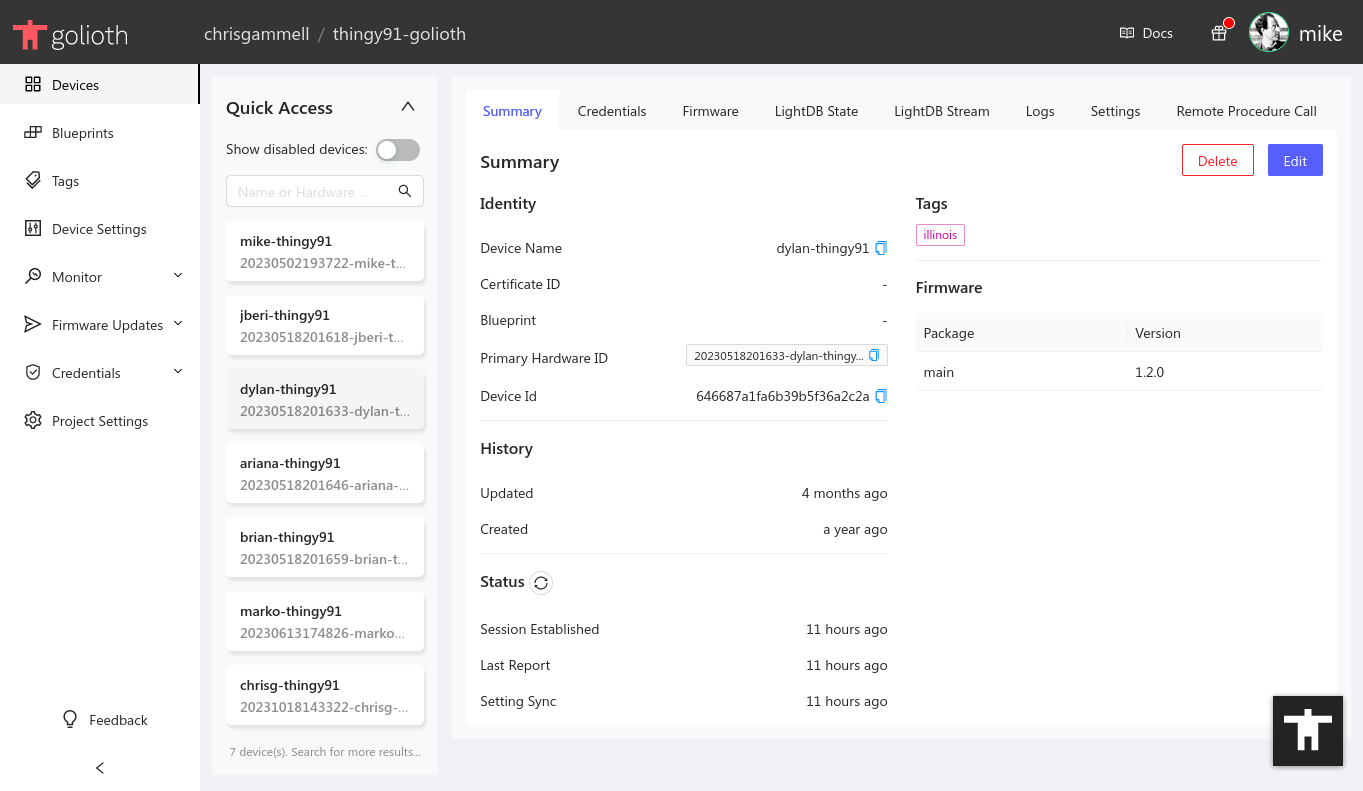
When the app connects to Golioth, the connection status will immediately be updated, along with the firmware version. You can visit the Golioth Console page to view information for this device.
- Pressing the button on the device will increment the counters in the LightDB State tab.
- Sensor data is regularly streamed into the LightDB Stream tab
- Remote logs may be viewed in the Logs tab.
- Device settings are updated in the Settings tab. Try using the left sidebar to
add a project-level setting called
LOOP_DELAY_Sand set it to15to change the frequency of sensor readings to 15 seconds. - Issue a remote procedure call (RPC) in the Remote Procedure Call tab, using
play_songfor the method withfunkytownas a parameter. - The Firmware tab displays last reported firmware version and status.
- The release page where you downloaded the
.hexfile also includes two.binfiles which may be used to roll out (and roll back) over-the-air (OTA) firmware updates. - Use the Firmware Update section of the left sidebar to control OTA updates.
- The release page where you downloaded the